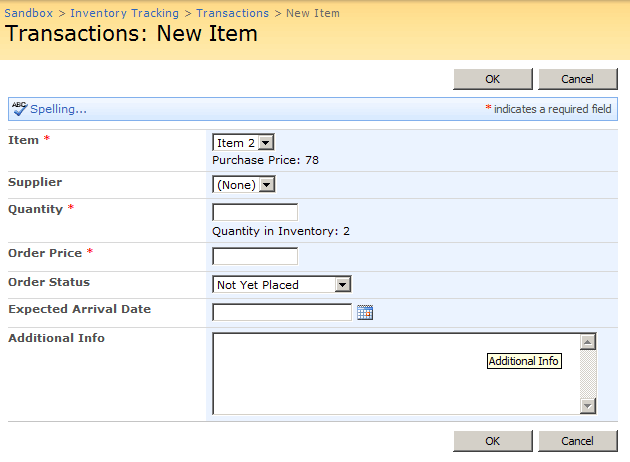
I recently saw an interesting question posted to the MSDN SharePoint Dev message board, which intrigued me, so I took a little time to do some investigation.
In the Inventory Tracking WSS Site Template (part of the “Fab 40” site templates for WSS), there’s a “Create Order” page, which really is the “New” page for a list called Transactions. That page has a drop down menu where the user can select an item to order. That “Item” drop down menu is looking up values in another SharePoint list called Inventory. The question was, is it possible to pass in an ID of an item in the Inventory list to the “Create Order” page, so the drop-down menu automatically sets to a particular inventory item, so the user doesn’t have to select it every time. (I can see how this would be helpful if you wanted to put a link on your site navigation to an “Order ___ product” page, instead of making users select that item every time they go to that page.)

To accomplish this, do the following:
Click on your “Create Order” page in the browser. Go to your Site Actions menu and select “Edit Page”.
You’ll see a somewhat hidden web part at the bottom of the page, below the form web part displaying the fields to be entered.

Edit that web part. Click on the “Parameters Editor” button in the web part tool bar on the side of the page. Add this parameter to the XML:
<ParameterBinding Name="InventoryID" Location="QueryString(InventoryID)" DefaultValue="1"/>Now click on the “XSL Editor” button.
The first thing we’ll need to do is add an XSL variable that refers to the passed-in query string parameter. Under this line:
<xsl:param name="dvt_apos">'</xsl:param>add this line:
<xsl:param name="InventoryID" />If you’ll notice, the majority of the XSL in this web part is really javascript. What you’ll basically have to do is edit the javascript in this XSL file to find the Inventory drop down menu element in the HTML, and reset the value to the @InventoryID property. Luckily, they already have a javascript function that resets the quantity and price values when the inventory item changes.
Look for this line in the javascript:
_spBodyOnLoadFunctionNames.push("setHandlers");Right before it, add this:
var inventoryPicker = getTagFromIdentifierAndTitle("select", "Lookup", "Item");
if (inventoryPicker != null) {
  inventoryPicker.value = <xsl:value-of select="$InventoryID"/>
}
Save your changes and test it, by adding “&InventoryID=2” to your Query String. Voila, the inventory box should be set for you right off the bat.
(Unfortunately, if you try to execute these same pages with SharePoint Designer, SPD won’t let you save web parts with javascript in their XSL; it will strip the javascript out, and your form will no longer work properly. Make sure you make these changes in the browser!)
